How I Opened and Cleaned My Portronics Bubble 2 Keyboard
Today’s blog is going to be something different.
For techies, the keyboard and mouse are probably the most used equipment in daily life. At my home desk setup, I have a Portronics Bubble 2. It is a decent gadget, and I have been using it for more than a year now.
For obvious reasons, it got dirty. Mostly the keys.
And personally, it feels ugly to use a dirty keyboard.
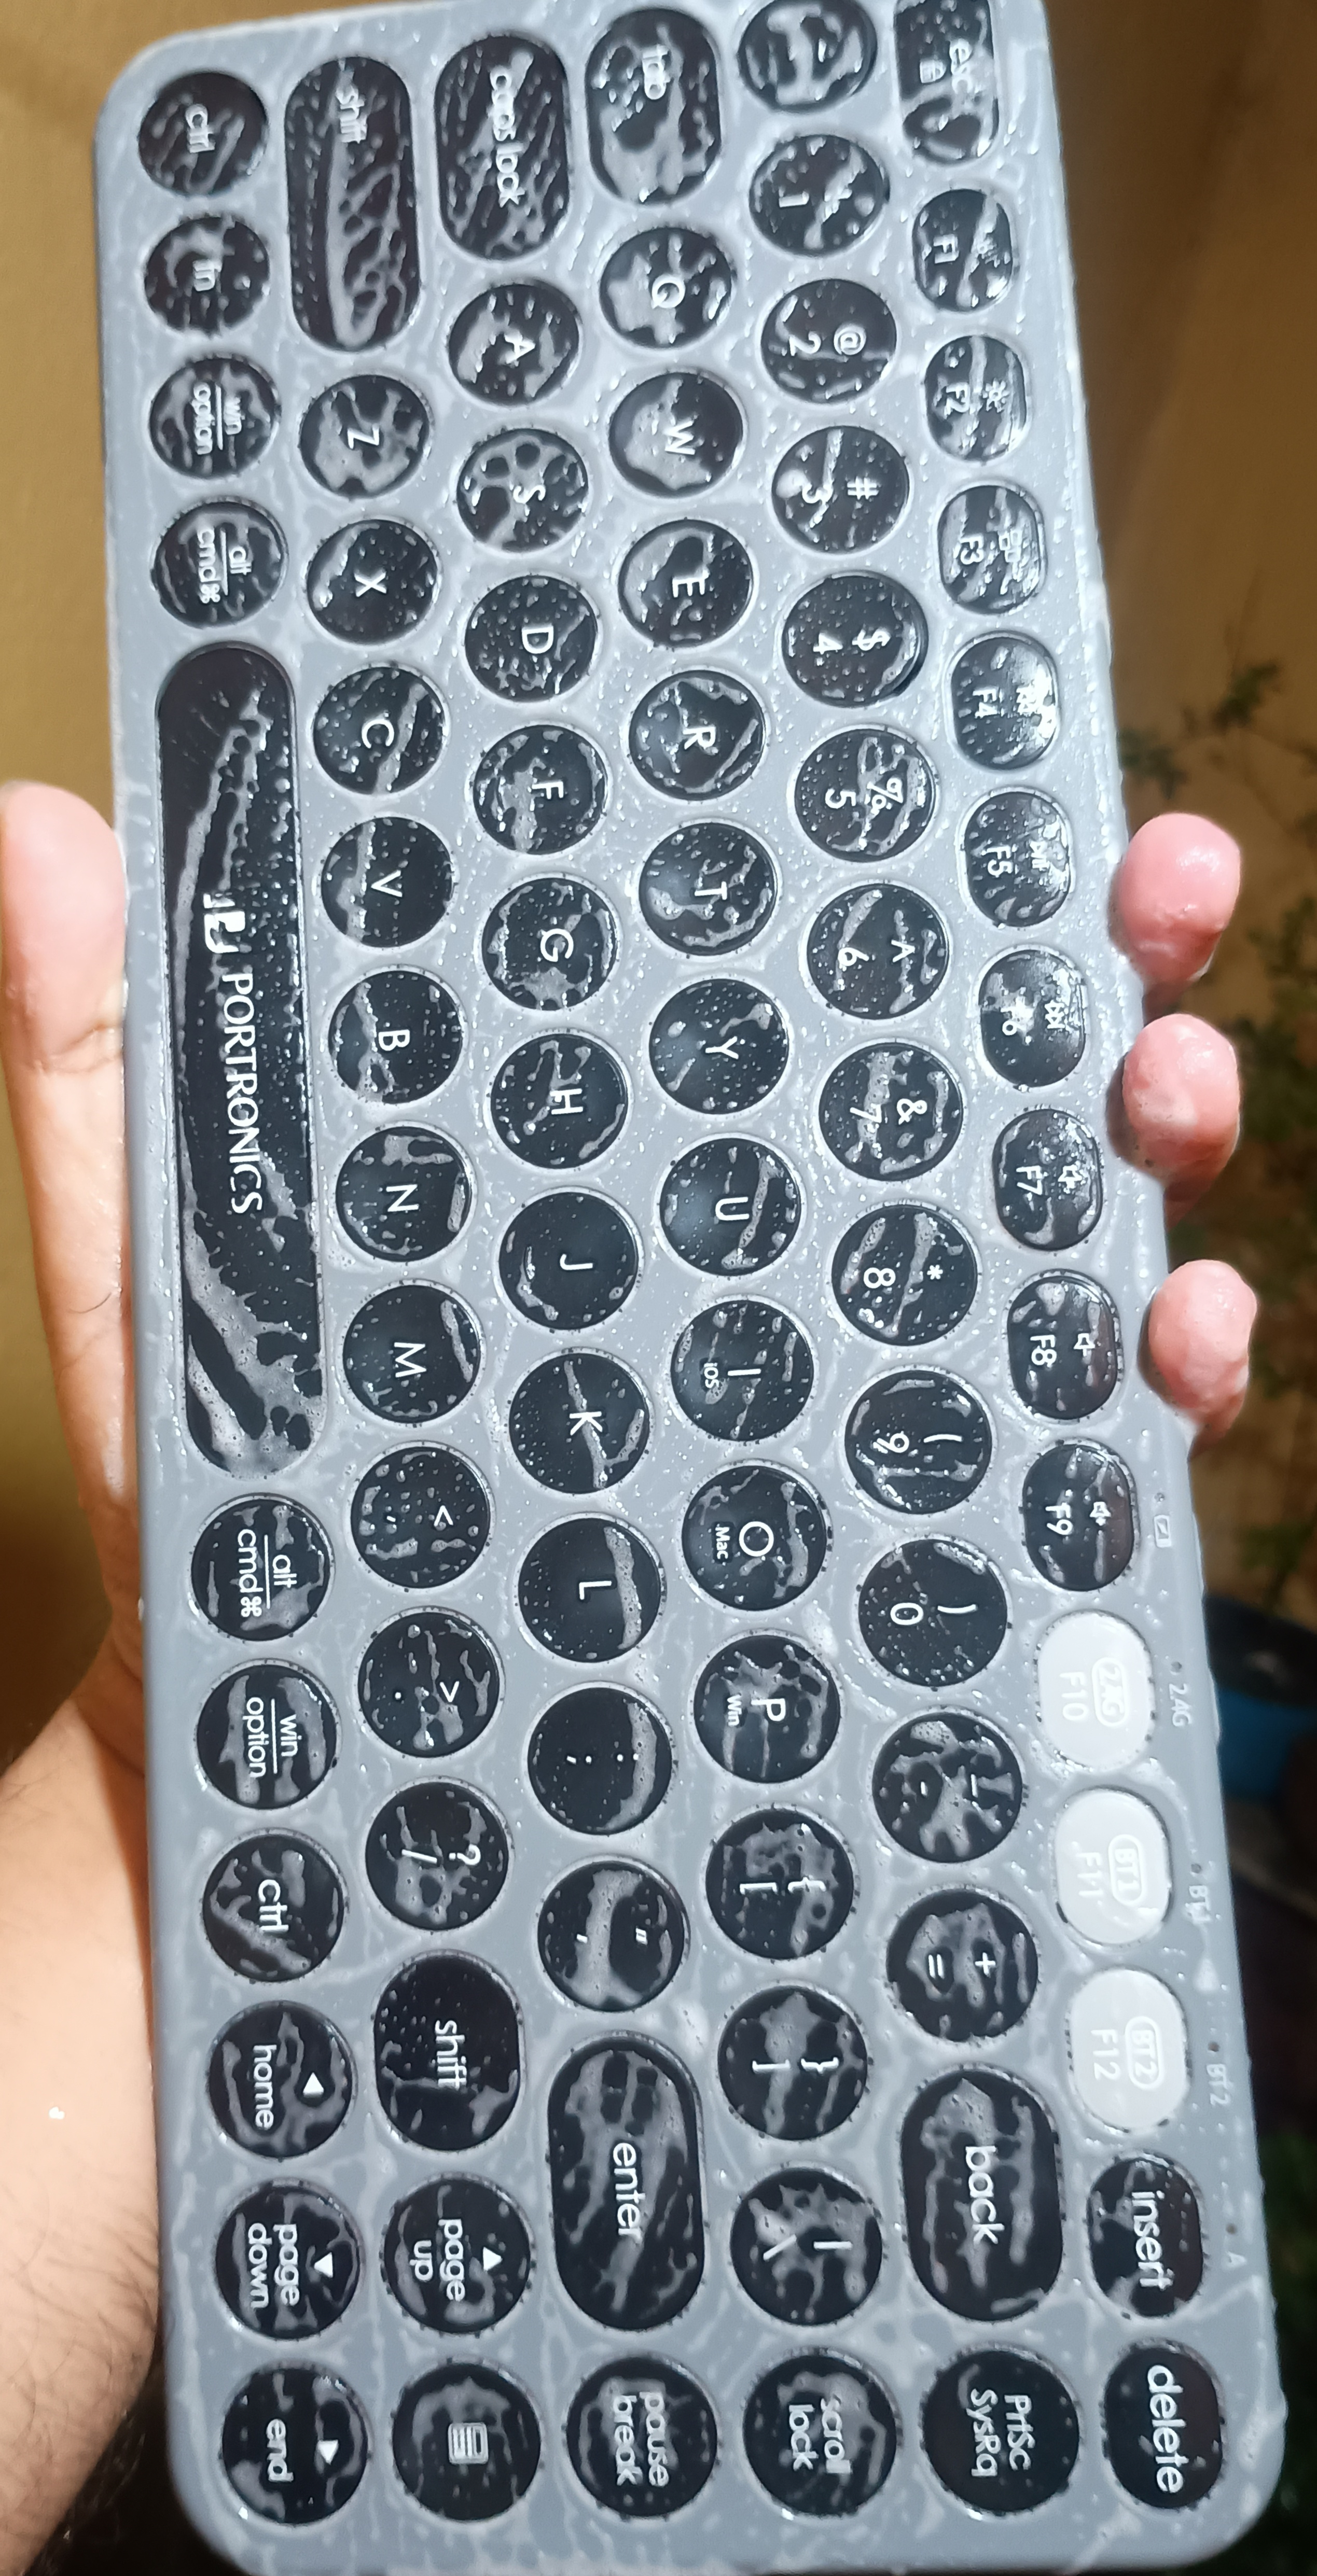
For a wired keyboard, I usually directly wash it with soap and water, then dry it completely. It is very easy to clean a wired one. But for this wireless keyboard, I was not confident about directly washing it. Battery, circuit, membrane, wireless board, everything is sitting inside. One careless wash and the keyboard may become a showpiece.
So I got a thought: let’s open it up.
The Problem
I opened the battery area first. There were three easily visible screws. I loosened them and tried to pull the cabinet apart.
It failed.
The cabinet felt stuck, and I did not want to break the plastic clips by forcing it. So I did the most normal thing: searched Google for how to open a Bubble 2.
Sadly, I did not find any helpful video or page. Most of the videos were just review videos, not teardown or cleaning guides.
So I thought, let’s write a page about this experience. Looks like there is no suitable content on how to open a Bubble 2, obviously without breaking it.
Screw Positions
There are more screws than the first three visible ones. The first six are on the back side of the keyboard.
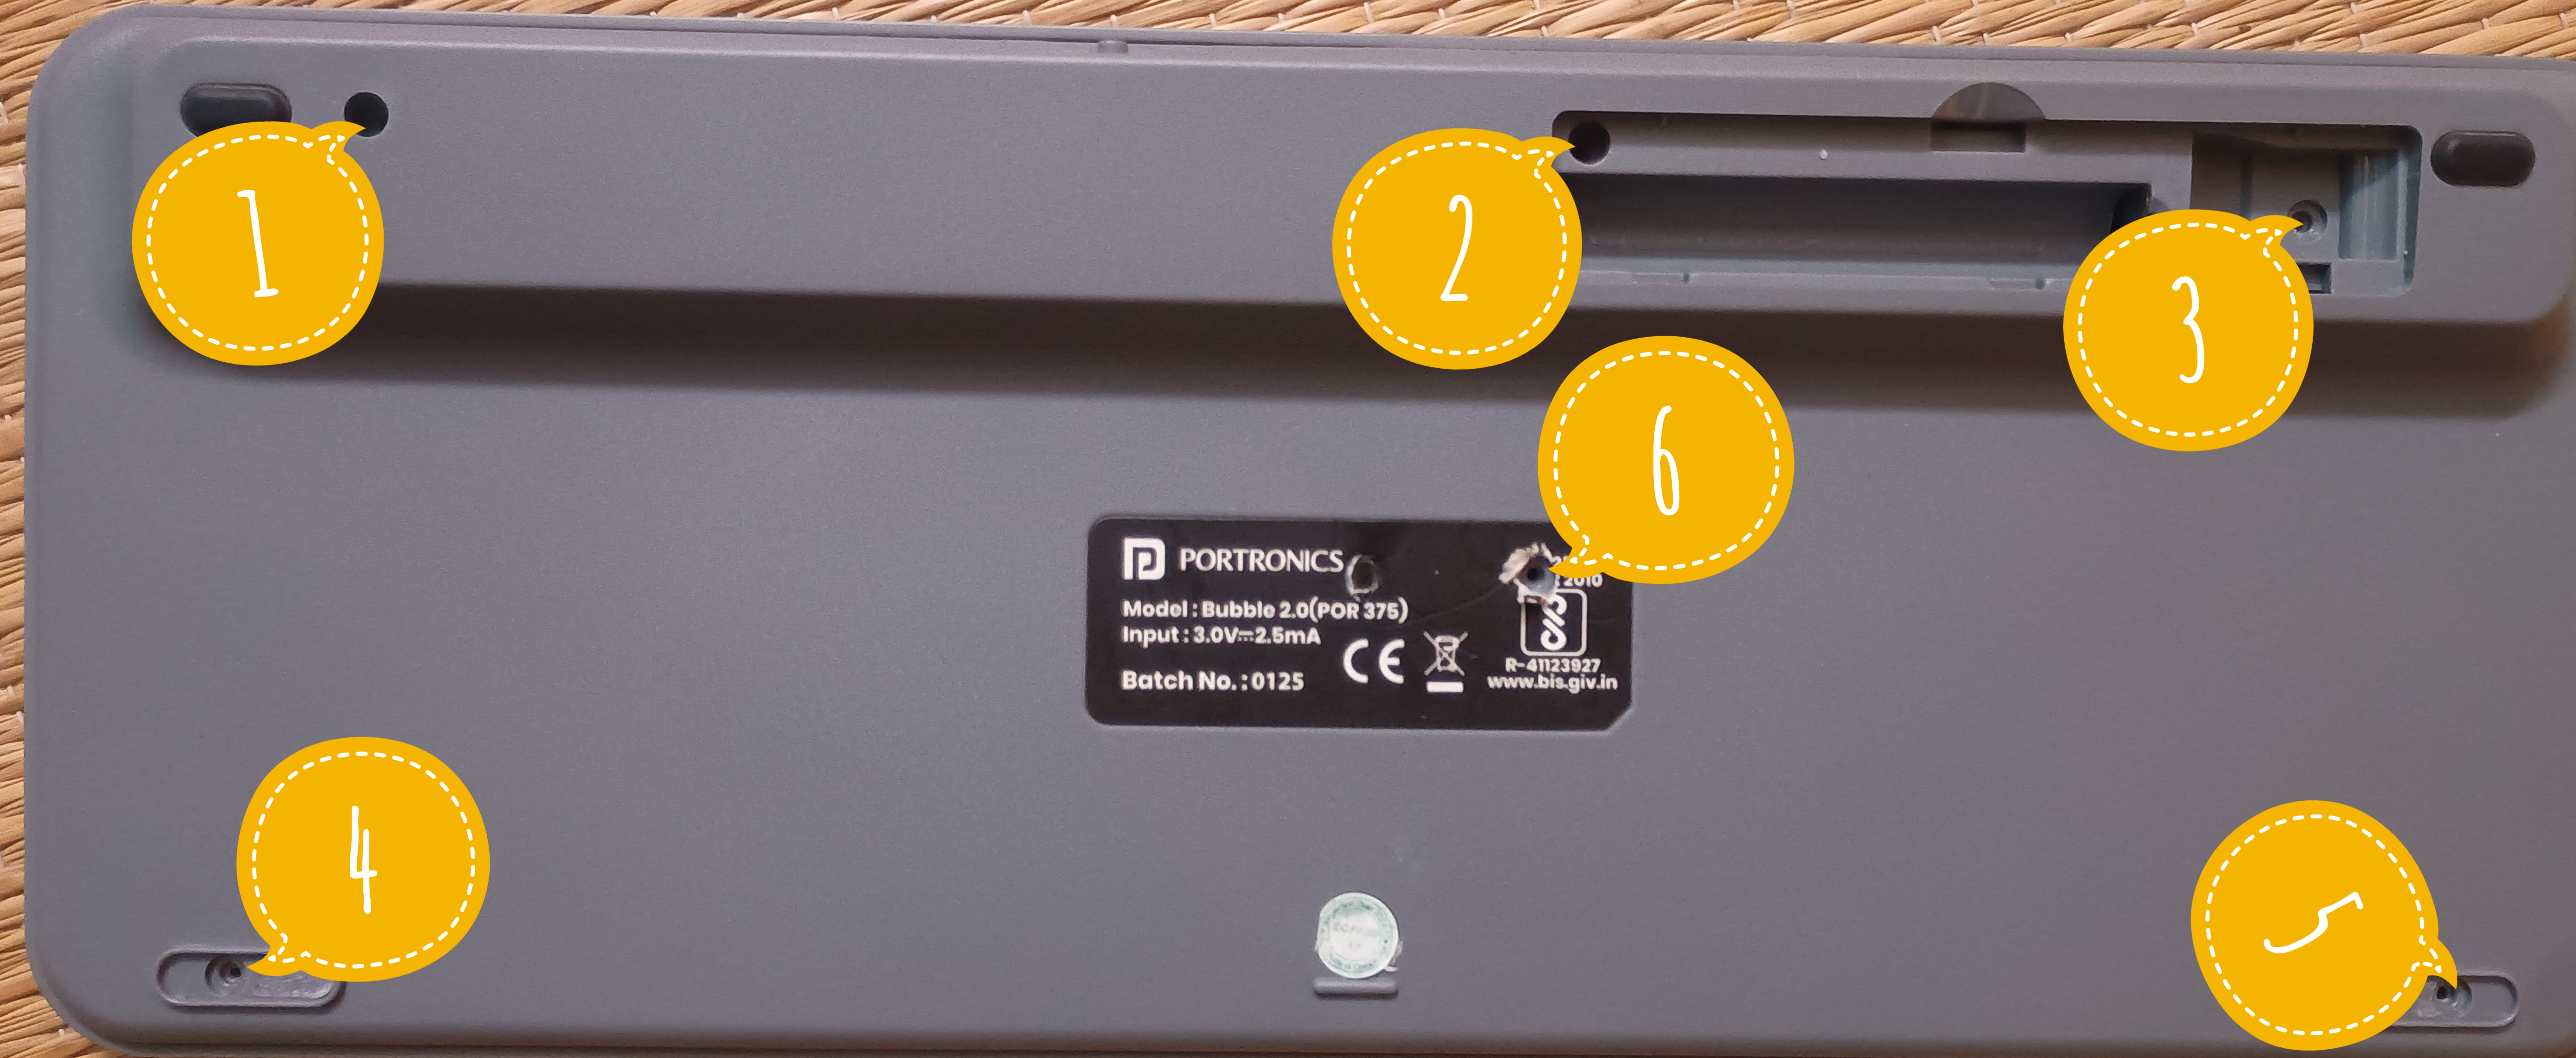
After opening those, the cabinet still needs careful handling. Do not just pull with full force. The plastic clips can still hold the body tightly.
Inside, there are four more screws, marked as 7, 8, 9, and 10 in the photos below.
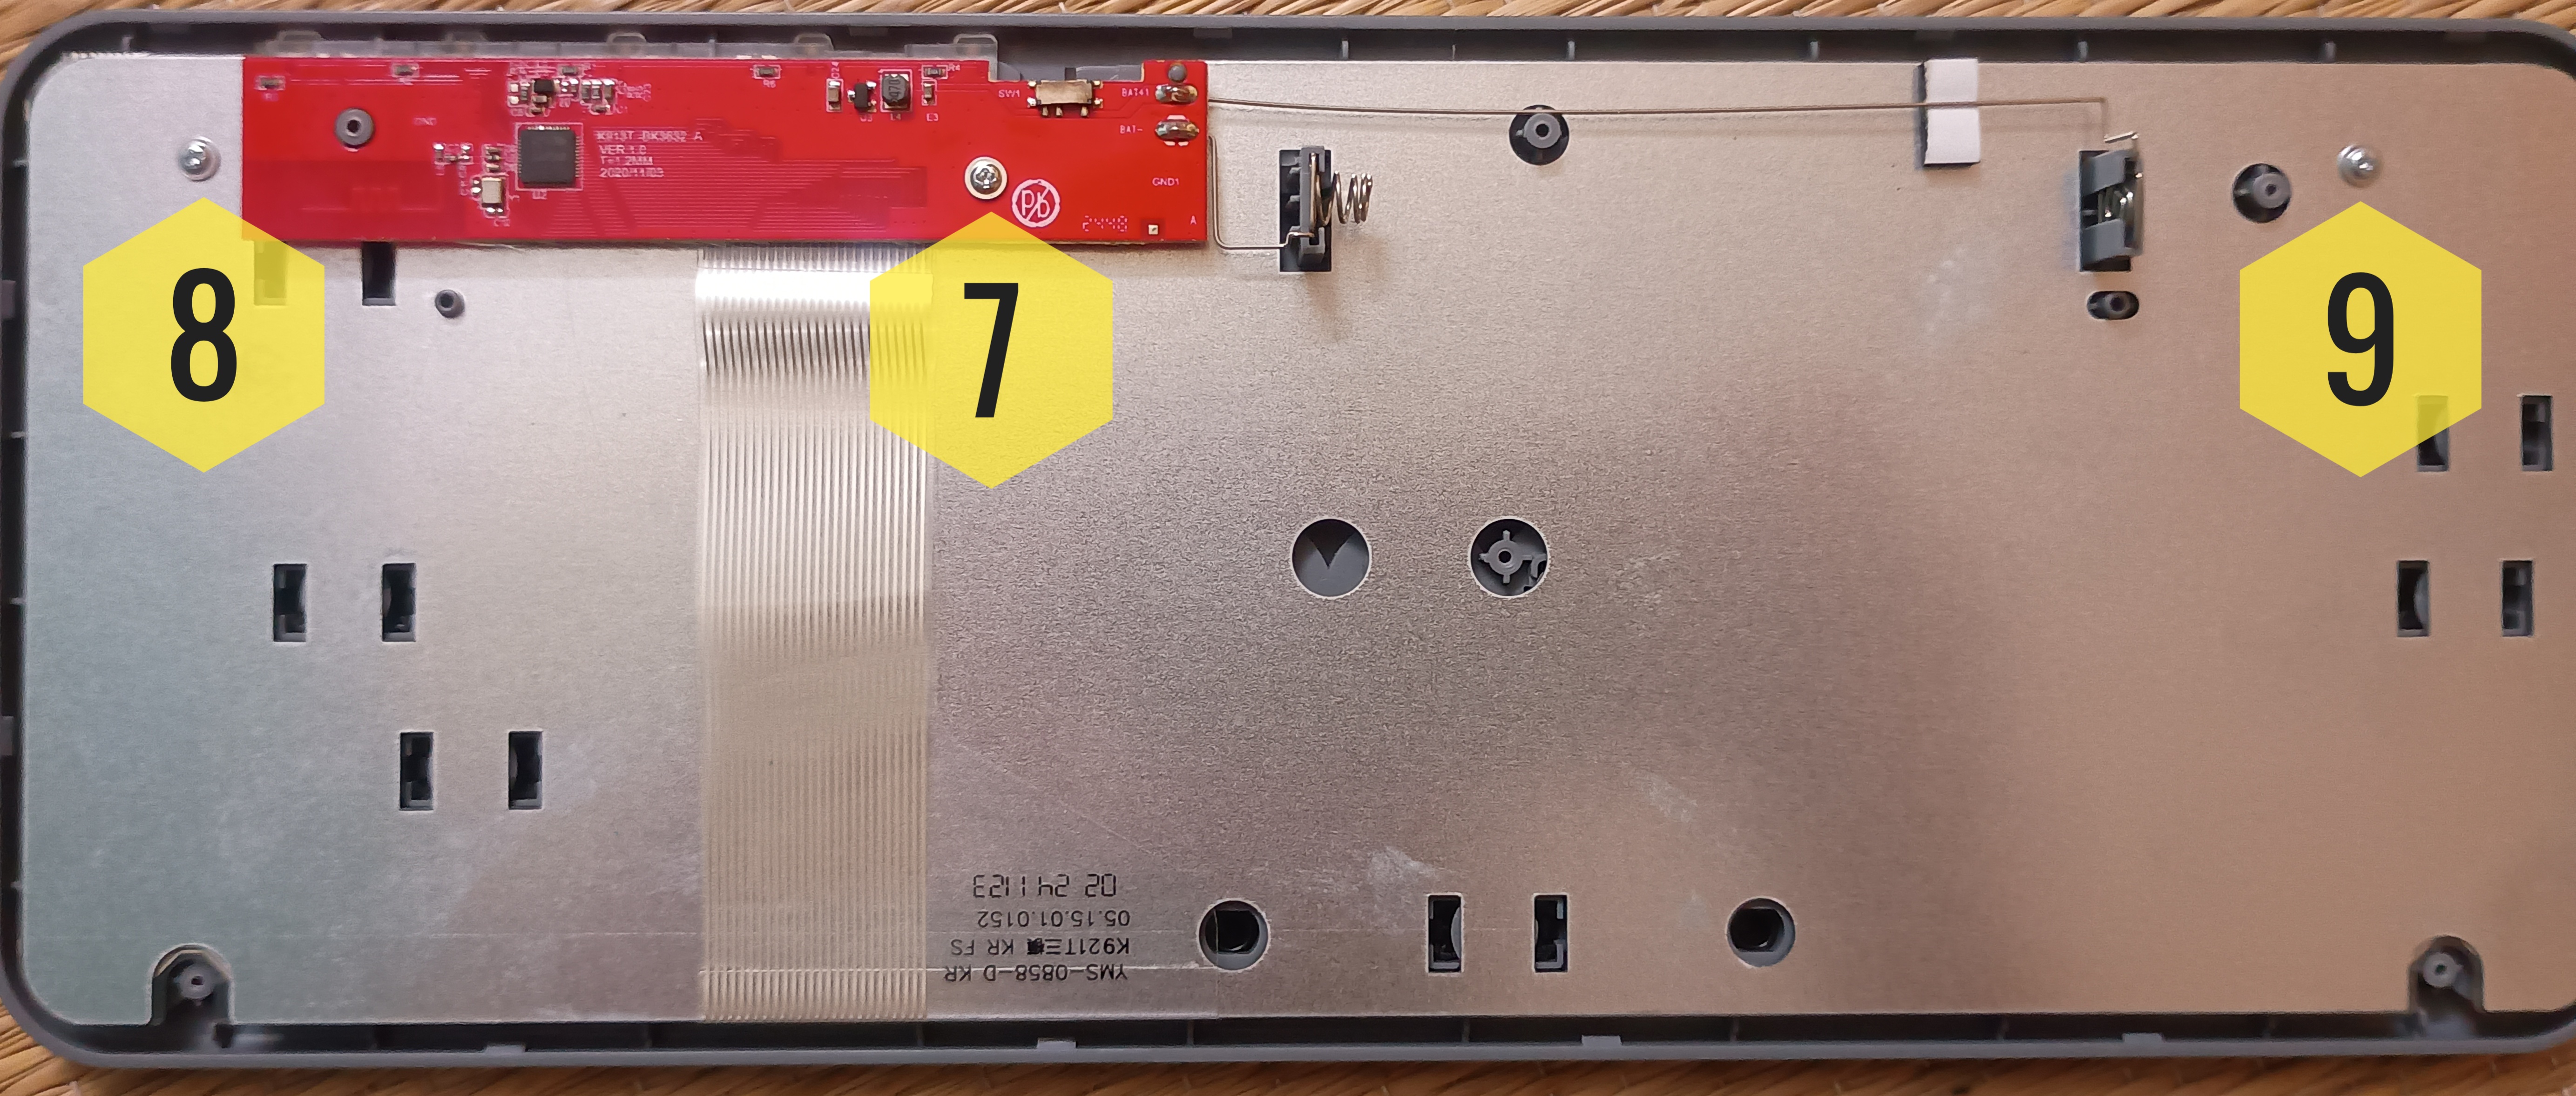
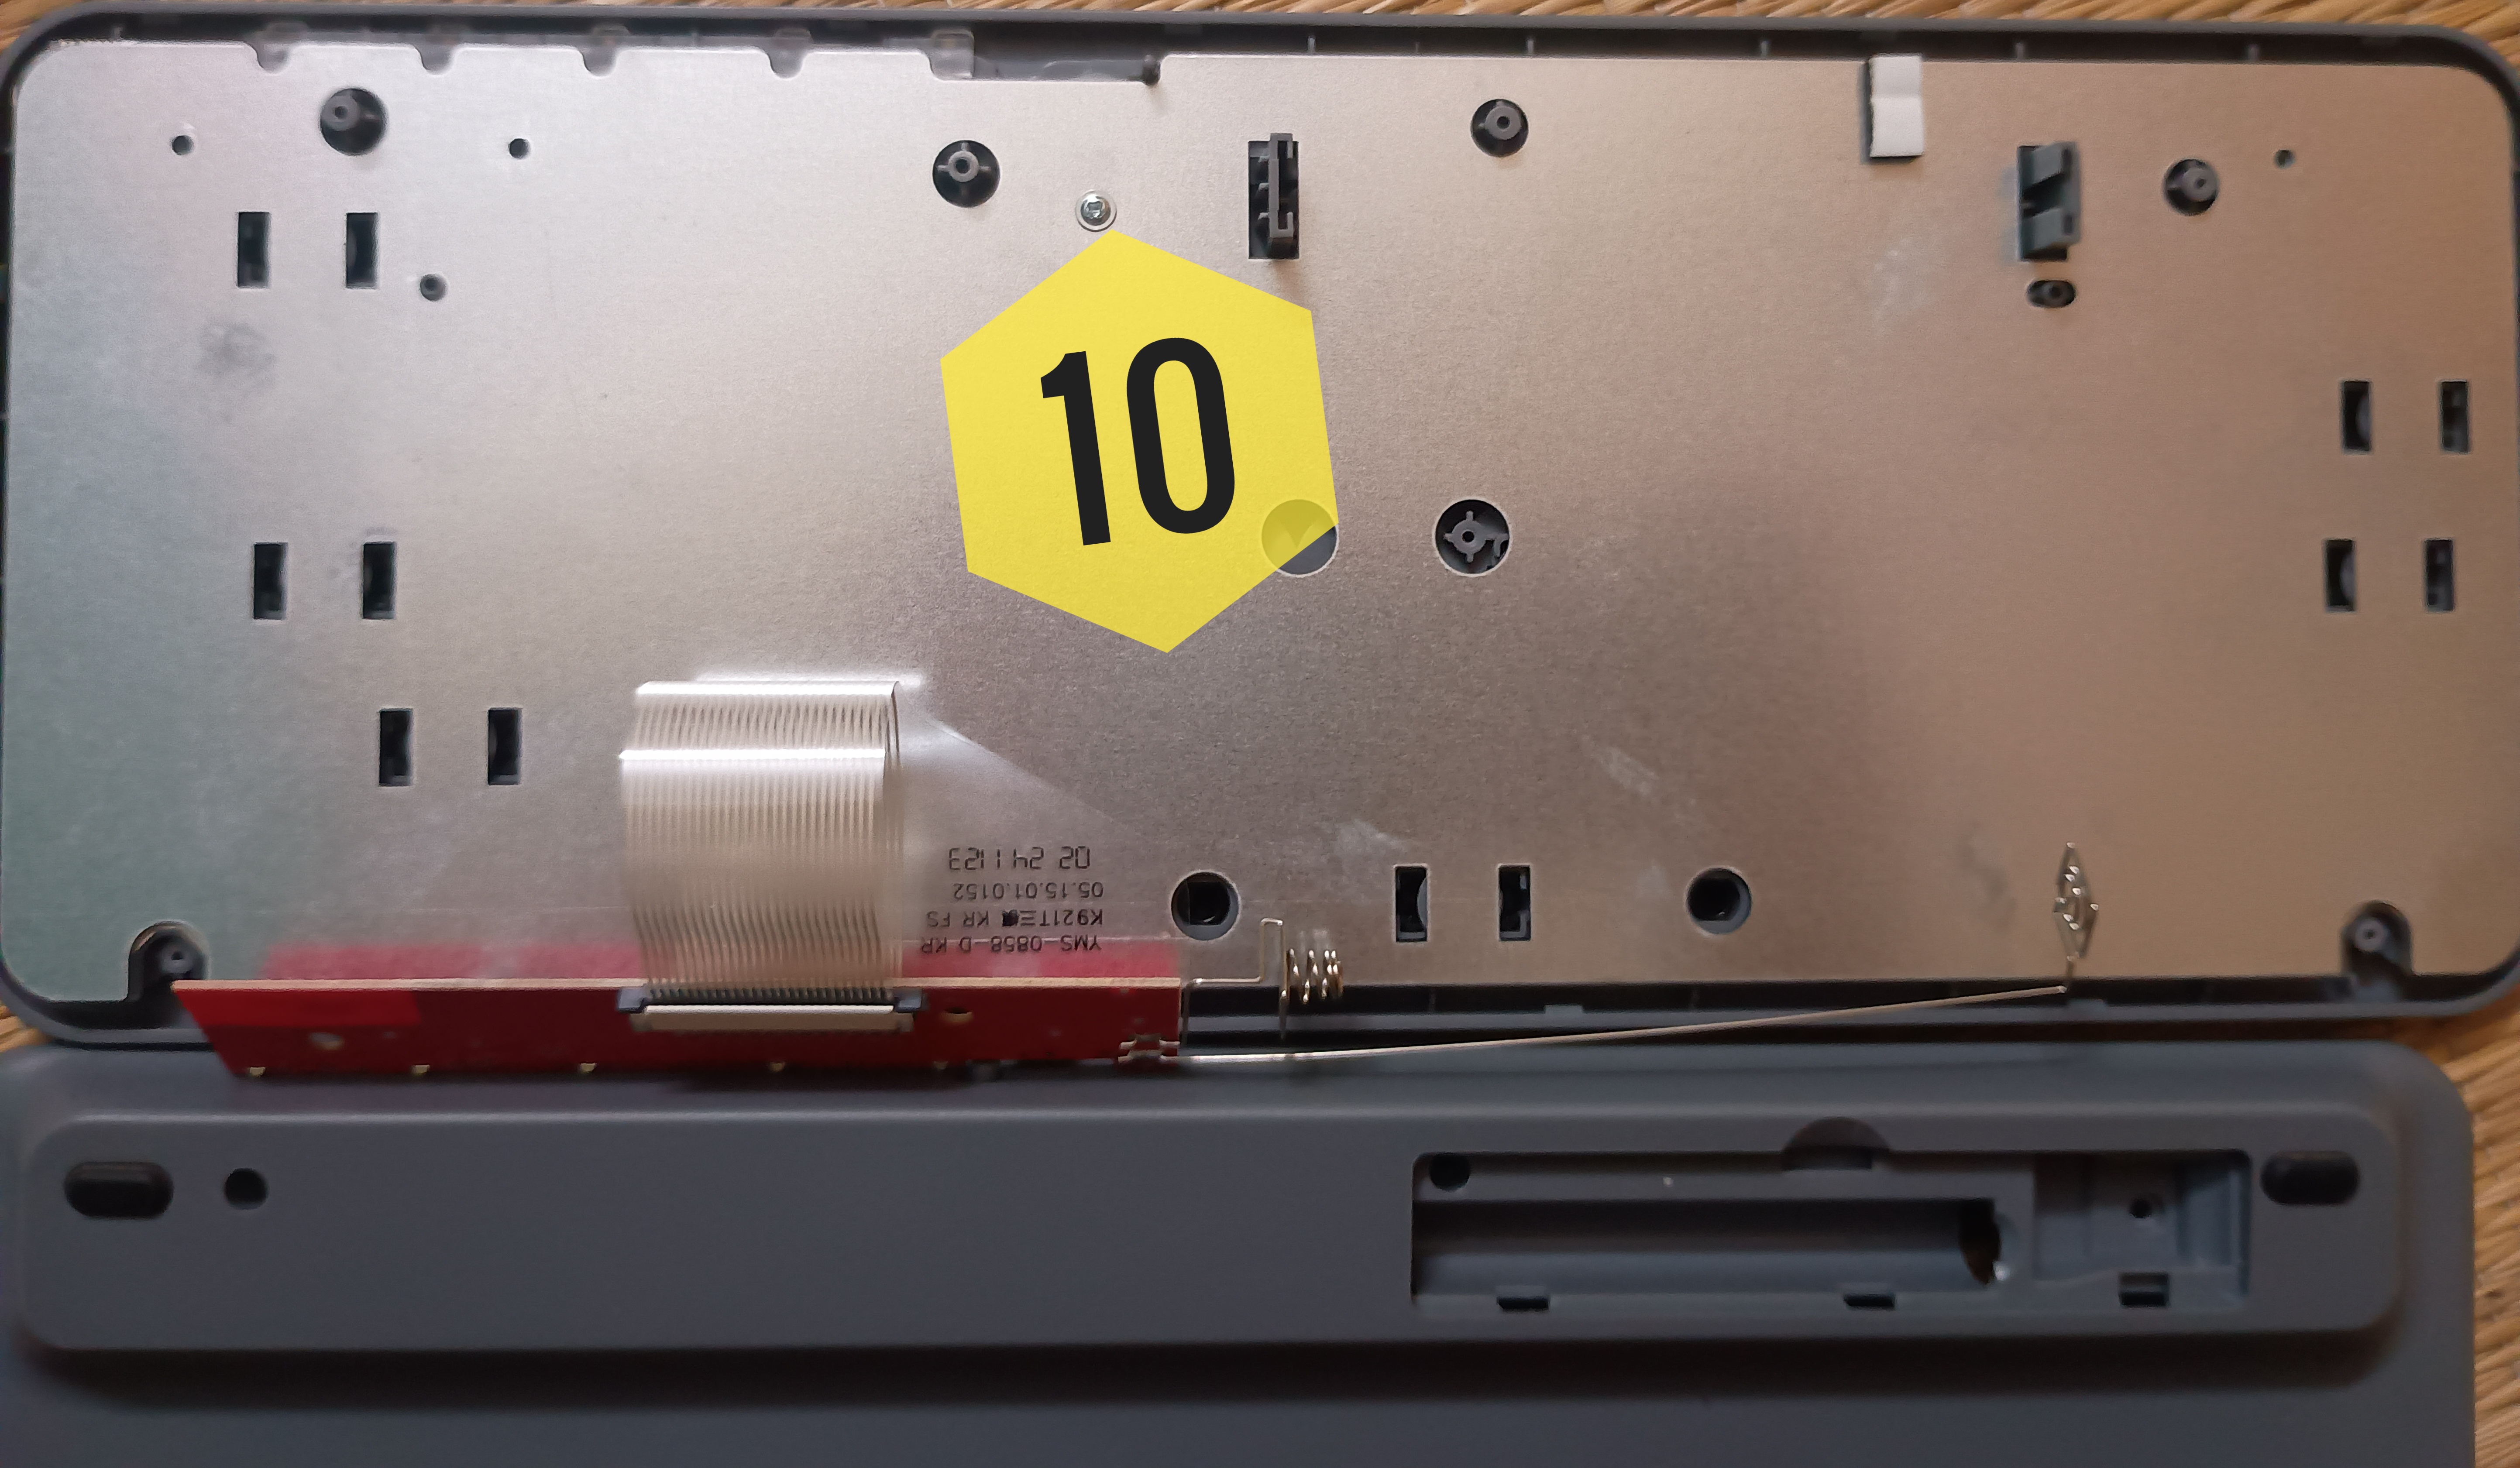
Once all the screws are removed, the keyboard opens up properly. This is where I finally understood why it was feeling stuck earlier. I had only removed the obvious screws, but the hidden/internal ones were still holding things together.
Inside the Keyboard
After opening it, the inside is pretty simple. There is the key membrane area, the red circuit board, the battery contact area, and the ribbon connection.
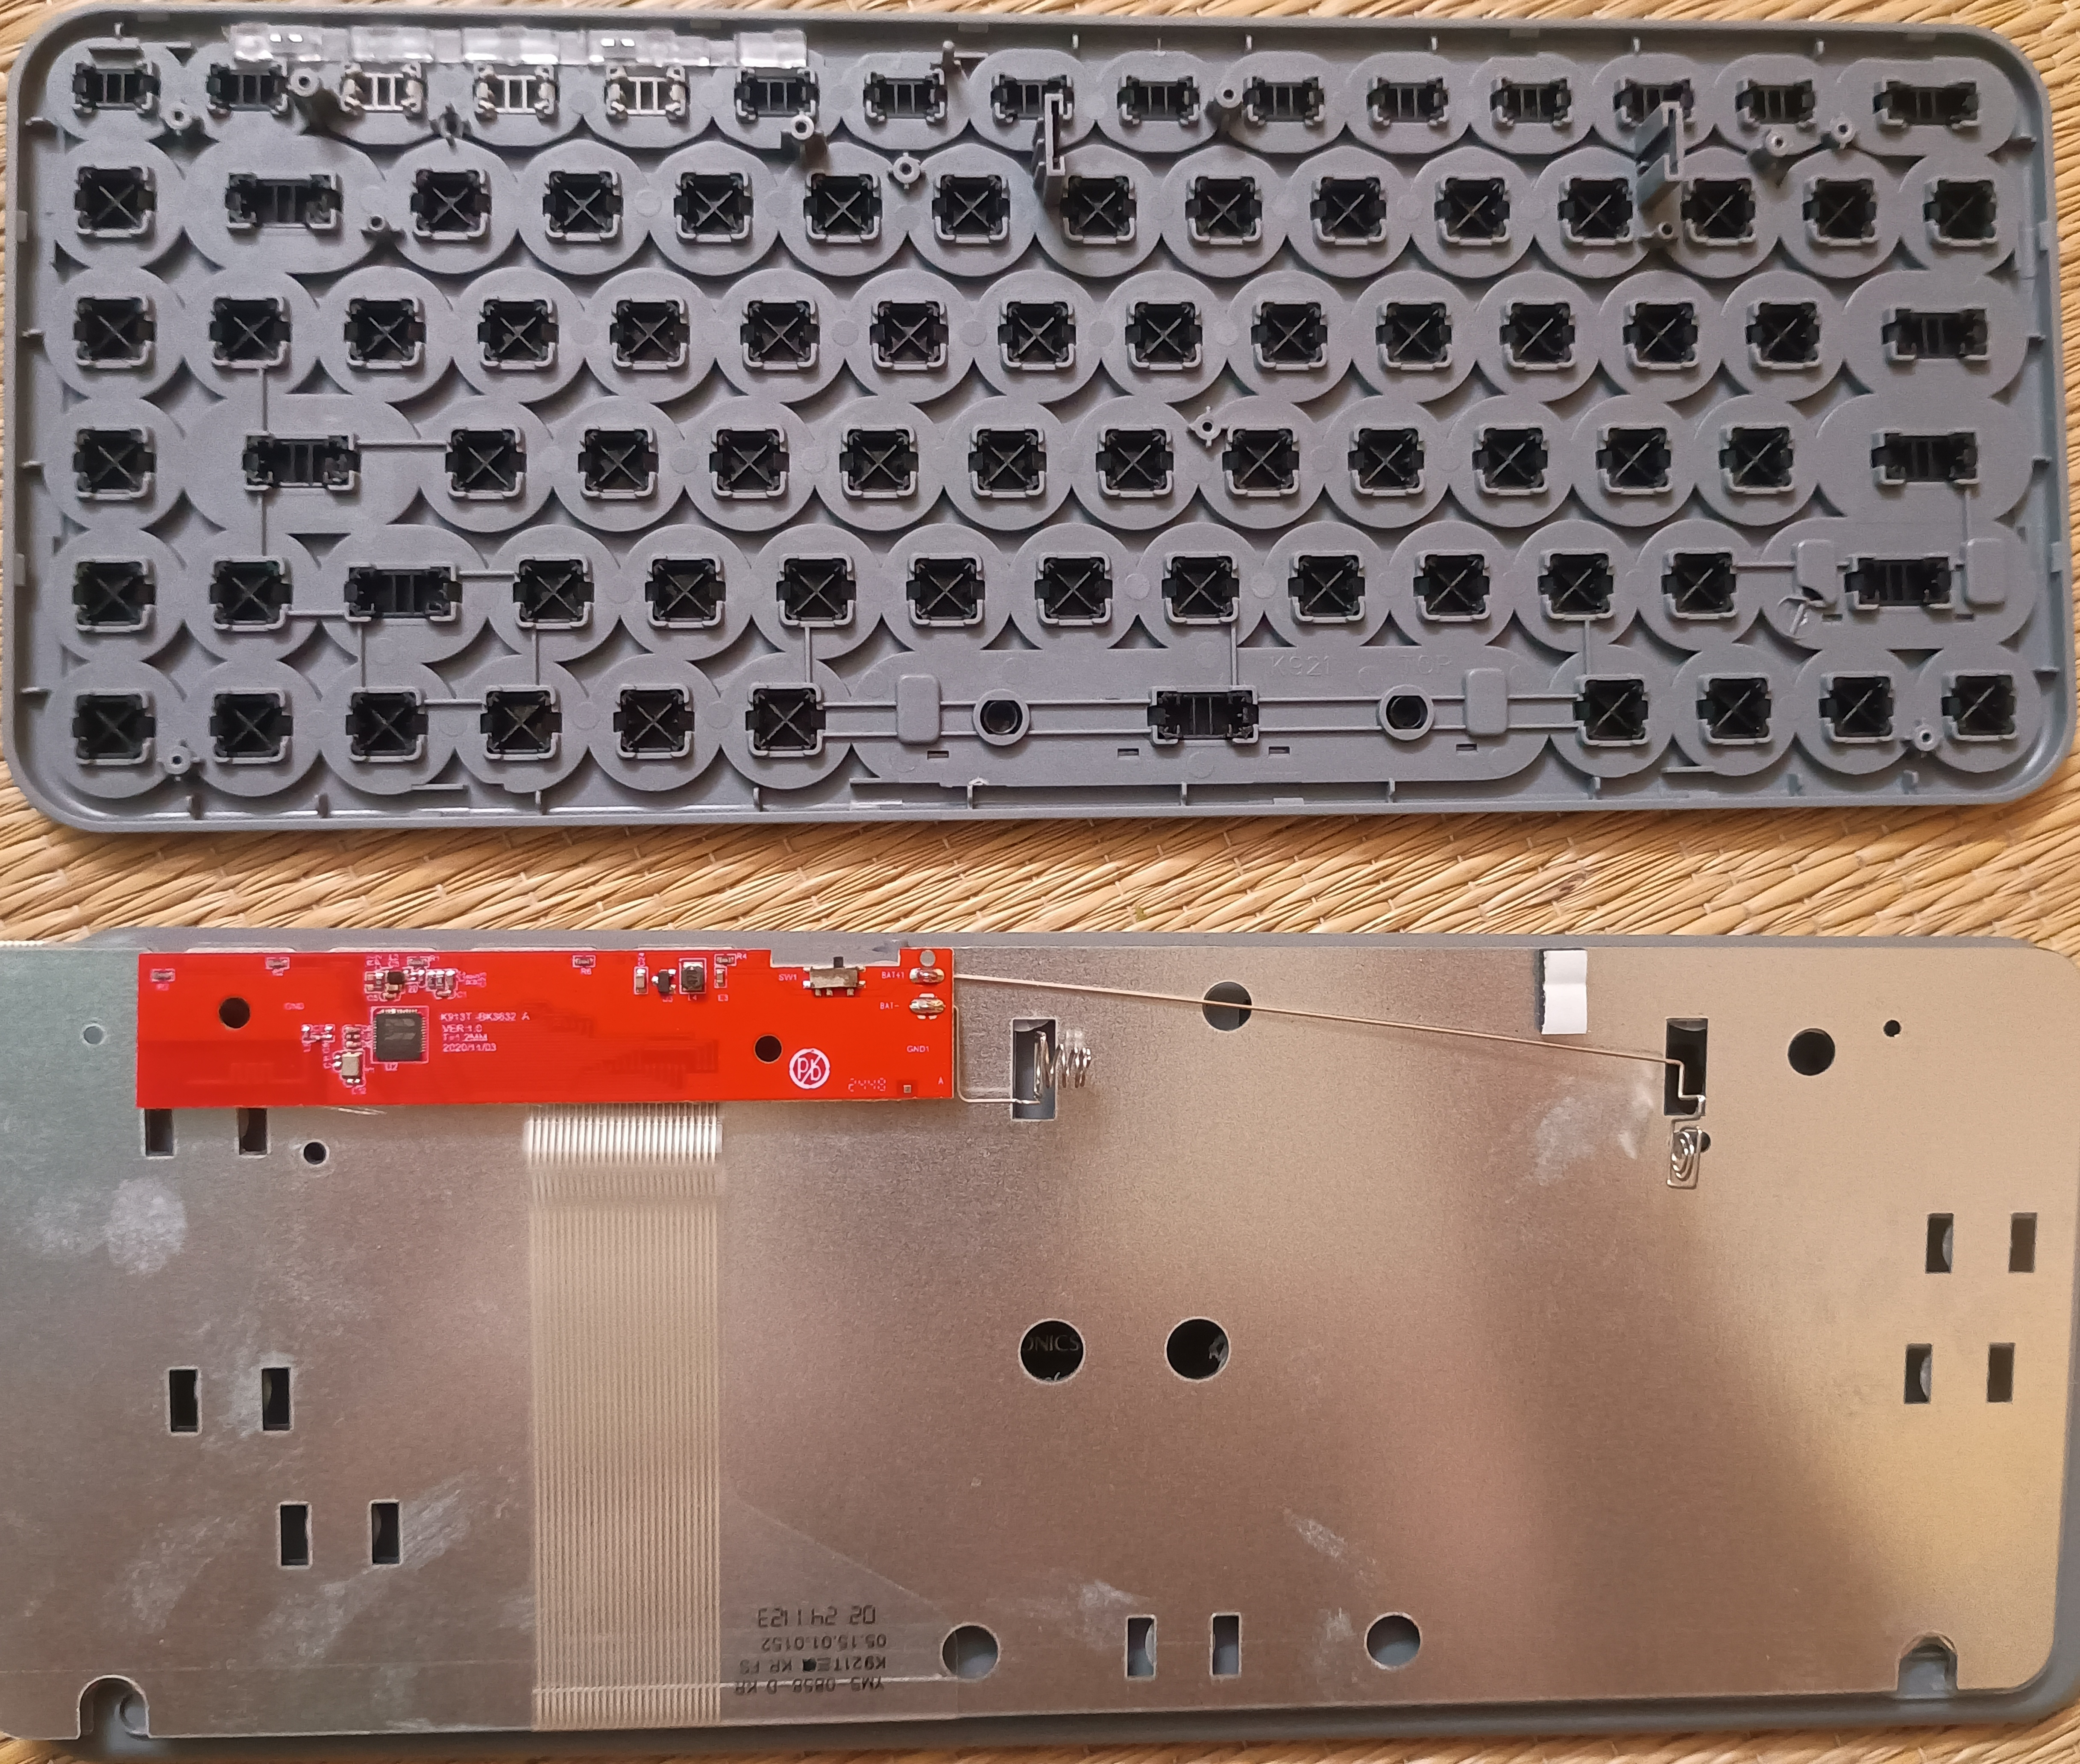
The keys and the upper plastic body can be cleaned much more confidently once the electronic parts are separated or at least kept away from water. I still suggest being careful here. Do not put the circuit board, battery area, or ribbon cable under water.
For cleaning, I used the normal approach: soap, water, and patience for the plastic parts, then complete drying before putting everything back.
Complete drying is important. Not “looks dry” dry. Actually dry.
Circuit Photo
I am also attaching a close photo of the circuit, in case any of my techie friends from the electronics department gets interested to mess it up further.
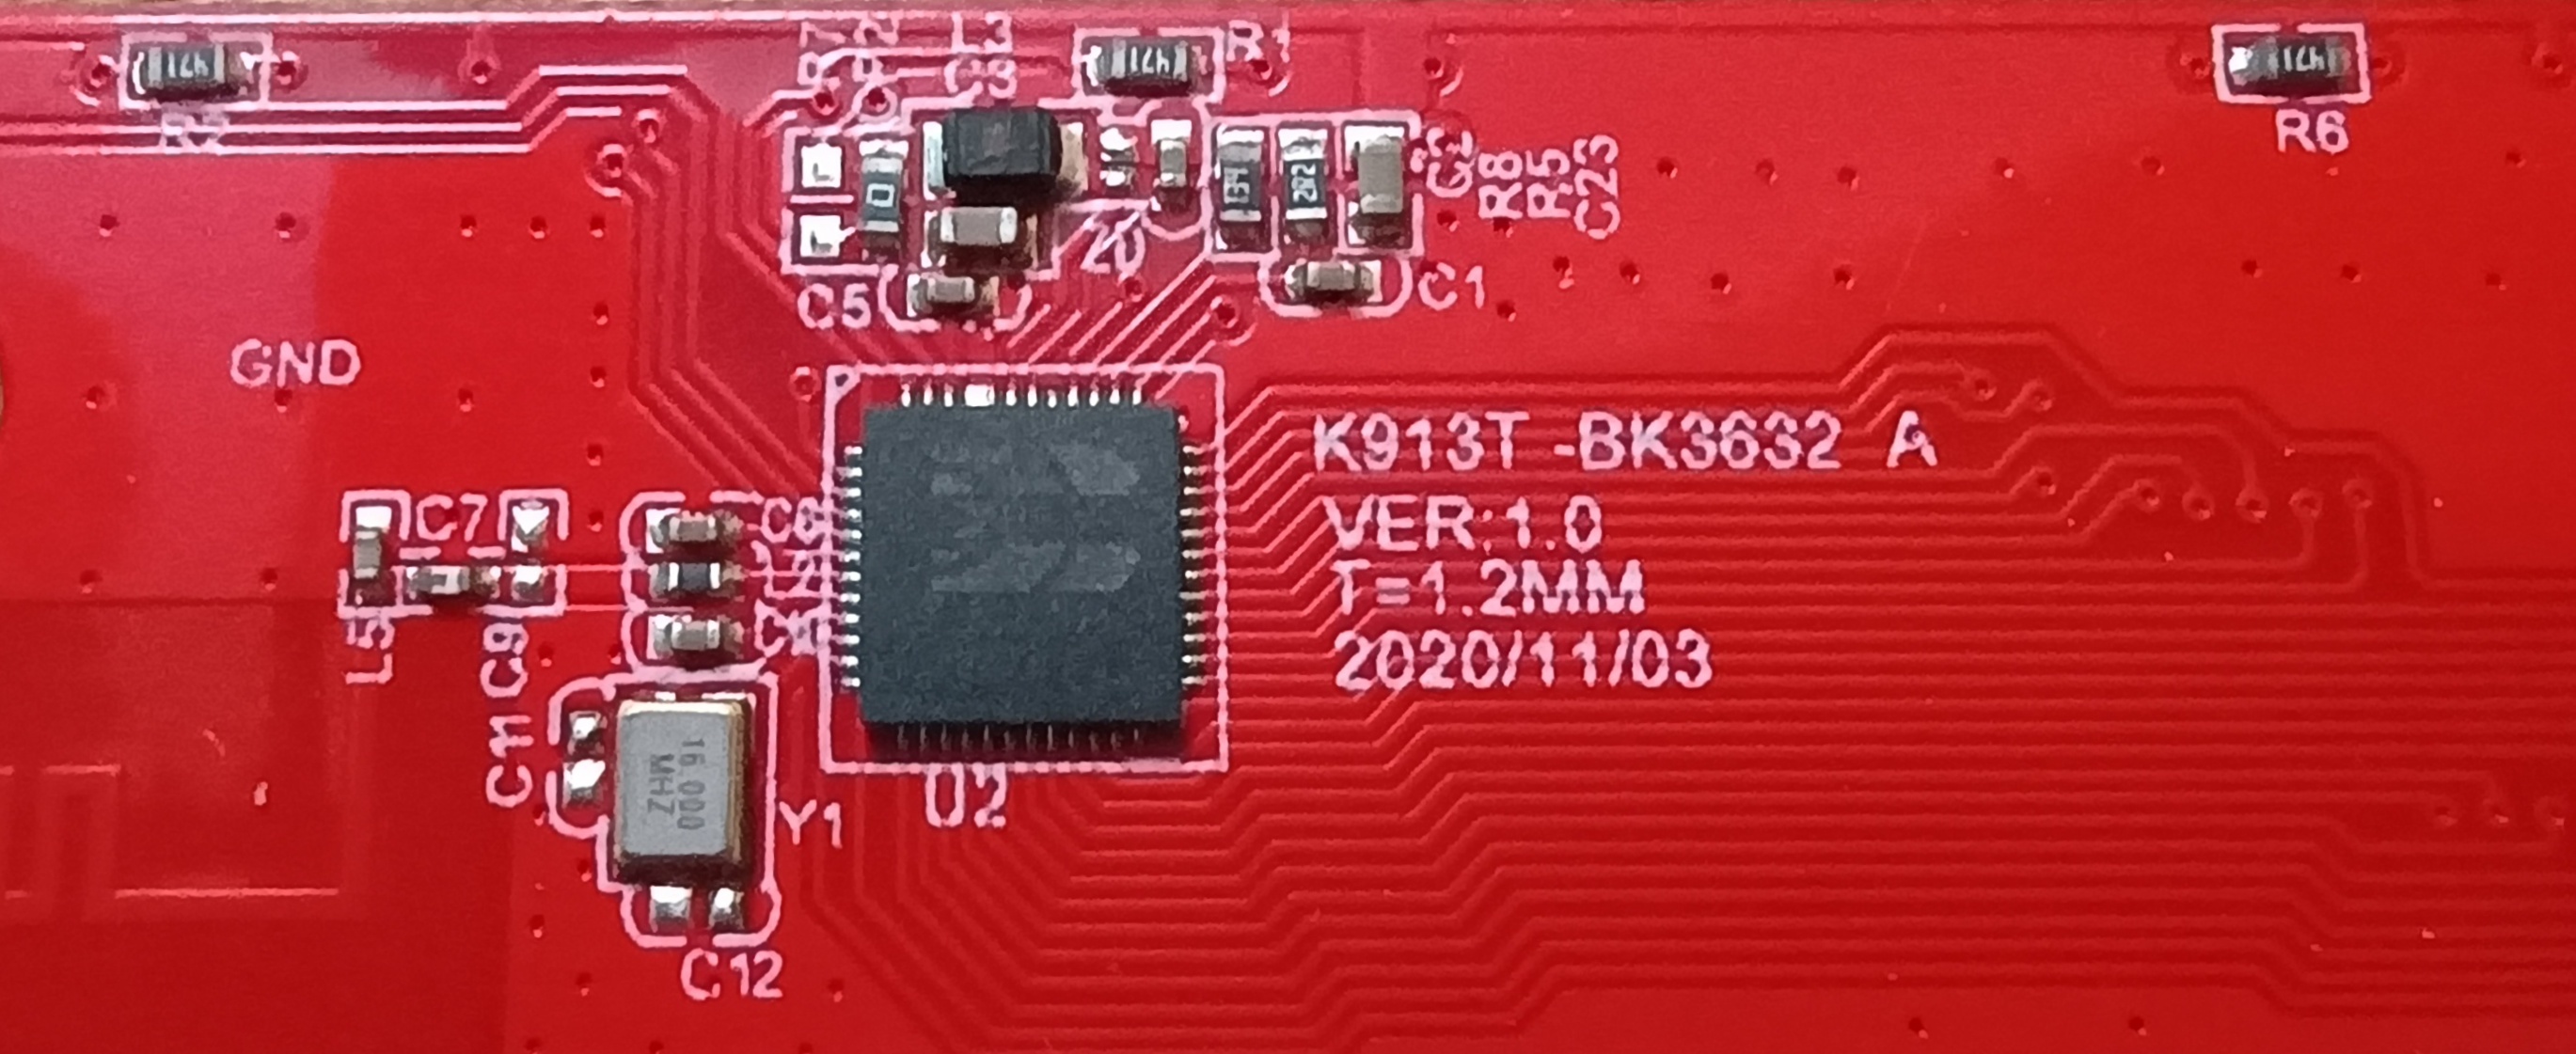
The board marking visible in my unit is K913T-BK3632 A, VER 1.0, dated 2020/11/03. I did not go deeper into the electronics side this time. My goal was simple: open it, clean it, and close it without breaking anything.
Final Notes
If you are also trying to open a Portronics Bubble 2, do not stop after the three visible screws in the battery area. Check all the screw positions carefully. The hidden ones are the reason the body feels stuck.
Also, do this only if you are comfortable opening small electronics. Keep track of every screw, avoid pulling the ribbon cable, and make sure everything is completely dry before reassembling.
For me, the keyboard survived, became clean again, and I got one more small teardown story for the blog.